Learn the best Photography tips for travel photography in this easy to learn guide
There are many things to consider with travel photography in taking beautiful photos and capturing those special moments to treasure and share with friends and family. It’s a constant learning process and changing conditions will challenge the photographer with difficult lighting, composition, distractions and unwanted elements along with many other factors. Following is a general overview of some photo techniques, suggestions and tips that you may already know, but this overview gives a quick summary to using your camera better and learning how to create amazing images of your vacation or travel experience. Further down the road, I will post more topics about specific photography techniques and tips to help you increase your skill sets, creativity and composition to make better photographs. Hope you pick up some good ideas from these photography tips for travel photography and put them to good use on your next trip.
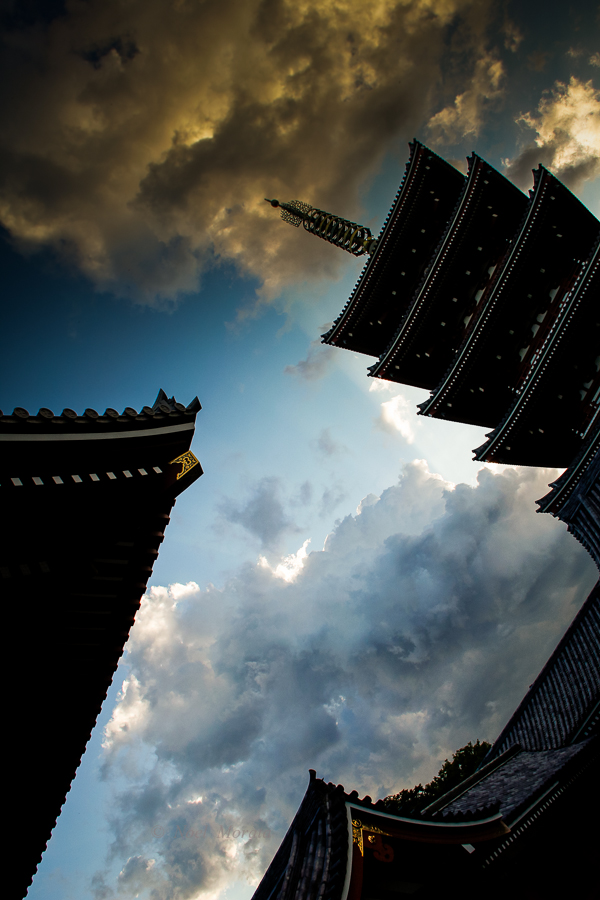
Learn some easy to learn travel photography techniques

Learn your camera
If you haven’t done so already, take the time to learn all of the functions and components of your camera so you can use these tools instantly when you are going for a certain look or presentation. Spend the time to read the instruction manual thoroughly or you can check out the manufacturer’s help sections on their website. Popular online sites like YouTube offers free training videos for using your camera and many other camera techniques. For specific cameras and training, look for 3rd party vendors who offer online or cd training for specific camera models. These are very helpful to learn the components and functionality of your cameras quickly so you can start using your camera to its best advantage.
It’s very important to learn how to use the many basic functions and advanced features of your camera that you can use quickly to create an image. (On DSLR cameras the basic functions are usually next to the automatic mode, and the advance functions like aperture priority, shutter priority and manual modes usually are usually located on the opposite side of automatic mode). Even some point and shoot cameras have advanced features that you can learn ahead of time and then use effectively when you’re at a place and use those features or techniques. In future posts, I will explain how to use and maximize the basic settings of your camera and later give instructions on using the advanced features on your DSLR cameras. It’s important to take the time to learn how to use the many features and programs of your camera and to practice and experiment as much as you can beforehand. Then when you are taking that amazing trip, you’ll be confident of your abilities in using your camera and knowing what features and functions to use to make incredible images effortlessly.
Do a little research
Spend a little time to research your destination online, or use search engines like Google or Yahoo for initial searching and getting information or links. You will get alot of information and photographs from your searchs to include key attractions, landmarks and other details of what may want to see when at the destination. Check out some of the images available on websites like Flickr or Trip Advisor to see photos done from different angles, viewpoints, or approaches to that location or landmark. Note down some of the interesting photos and viewpoints or vistas that you may want to also visit, and how you can create your own stamp ot presentation of these attractions.
Spending a little time online on websites like Tripadvisor or Lonely Planet, tourism boards or even personal blogs will give you suggestions to key attractions, worthwhile places to visit, recommendations and other helpful hints to visiting those sites. Make sure to check your guidebooks to investigate or highlight possible venues, must-see attractions or must-do activities. When you arrive at a particular place, visit the local tourist office, look at some brochures or have a chat with the tourist advisor to get more information about photo-worthy places, best timeframes to visit and other unique or must-see places to visit in the area.

Shooting photos in limited timeframes, locations and conditions
Many travelers have travel constraints like a being on a guided tour, limited viewing timeframes, designated reservations at a site, and taking photographs mid-day and in harsh light. Not the ideal in creating amazing photography when professional photographers usually go at the best times and they visit often to capture the best moments from each place.
So what is the best way to offset these challenges? The first thing is to try to avoid harsh day light conditions as much as you can, if there are no choices at this timeframe, make sure that you take the time to compose and eliminate unwanted distractions and unpleasant light conditions in your view finder. Try to create a more balanced composition by varying your technique to include zooming in on details, shooting at different levels or angles or shoot under covered areas to avoid harsh light. Also, make sure that you crop out any distractions, over exposed areas and blown out skies, or very dark contrasting areas with little detail. Find any available place that you can shoot nearby in the shade or even filtered light so that you can take pictures of more evenly balanced images with nice lighting, details, and attractive compositions. Taking photographs of people, objects or any subject matter in filtered light or shade eliminates the harsh lines, overexposed details and creates more pleasing and natural compositions. Take close up images or detailed photos to create a different focus and point of view, meanwhile you can crop out those problem areas, harsh light or unwanted details in your image.
A favorite technique to learn is to use your exposure compensation slider which is available on many cameras and even cell phones. Using exposure compensation (usually some type of slider or levels adjustment found in the camera menu) allows the photographer to cut out the extremes of under exposed or over exposed sections in an image.
Learn advanced photo techniques
Taking the time to understanding your camera is crucial to getting better pictures, and spending some time to learn more advanced techniques will increase your skill sets and experience in mastering camera techniques. Understanding camera techniques like bracketing and HDR (high dynamic range) techniques will allow for better image making and help out with changing or unfavorable lighting conditions like dimly lit areas or overexposed areas. Bracketing technique is when you take a series of the same image (usually three or more images), one image is over exposed, the other image is under exposed and others in between those ranges. It’s good to use bracketing in tricky lighting conditions so with a variety of images created, you can choose the image that looks best from that location.
HDR technique is similar in technique to bracketing in that you take a series of photographs of the same image, overexposed, underexposed and normal images. Afterwards, you use a photo software application like Photoshop to merge the series of images into one merged image. This merged image is effective in that it brings out all the details and lighting conditions within the framework of that image. With the software, overexposed images can then be corrected or minimized and underexposed areas can be also be lightened up. With the software application, you can also manipulate the image to present something more pleasing and natural or you can tweak the photo to create more vivid imagery, 3D effects or even super-real fantasy effects and take the image into another realm entirely.
Additional photo considerations
Consider the white balance and ISO setting you are using at a particular site. Various settings of daylight, interior lighting, shade, etc. creates a different look and feel to that image that you may want to portray and manipulating the white balance and ISO setting directly affects how the image looks. You can change ISO and white balance to suit your vision and create a unique look and feel that you may want to present through your images.
Using any of the basic features or advanced features on the DSLR camera like aperture priority, shutter priority, or manual mode will allow for further control and help you focus on your image making and create more dynamic presentations of your subject matter. In some future posts, I’ll explain how to use some of the basic features and the advanced or custom settings on the DSLR camera. I’ll demonstrate how to use these certain settings which setting would be the most appropriately choice based on the subject matter.
You may also consider having a tripod or monopod with you for photographing low light, night-time photography or landscape and detailed images where you want everything in the image tack sharp. Great panoramas and landscapes require tripods if you want to capture all the details. The hard part is deciding if you want to carry this along and have the time to set up and break down the tripod.
Using filters are great for creating different photo effects; the most useful filter to bring along for traveling would be a polarizing lens. Using this filter will bring out the details and blues in the sky, it will help to reduce unwanted reflections in water or glass, and it stops down the light in harsh conditions and creates a more natural lighting composition.

Practice, experiment and enjoy the moment
Spend a little time with your camera while you are waiting at the airport or in between places to practice your technique and experiment with your camera settings. The more comfortable you are with using all the features of your camera, the more fun it will be to explore so many facets of travel and bringing out your own creativity and viewpoint to your photography. It great to take the time to capture a particular image well and then relax and enjoy this beautiful site and moment.
Please pin this for later

If you enjoyed these camera tips, please check out some of my other photo tips below
Black and white photo tips for beginners
Capturing street images – some photo tips and techniques
15 photography tips on your road trip
Photography tips for grey sky or rainy days
Flower and nature photography – tips on making your images pop
Photographing people – some tips and techniques
Photography tips for travel Photography
Travel photography – what to pack
Photo tip – backlighting your image
Food photography – making your images pop
Have you tried any of these cool photo techniques?
Enjoyed doing any of these travel photo techniques or other fantastic photography tips? Please share your thoughts in the comments below.
I hope that this was helpful and you enjoyed this post with Photography tips for travel photography. If you have any other photography tips or observations to share along with this post, please feel free to add your comments below for our readers to learn better photography techniques and skills.
If you like what you see, come and check out my other social media channels for more updates, including Instagram, Pinterest and Twitter

Hi,
During our lifetime we enjoy to capture photographs of our most memorable events.
Glad you enjoyed these photography tips for travel photography, thanks for visiting
Great tips!
Thanx for sharing those!
Kind regards from Berlin,
Alexandre
Great tips!! I need to pick up my “nice” camera more often at home. Not just when traveling. I find I often forget a lot of what I learned because I don’t use it every day at home.
Hey Noel, stumbled across your blog from BootsNall Travel about why you travel. We want to learn photography and wanted to see some of your photos! Excited to subscribe and get tips on photography from a fellow traveller. That top photo for this post is beautiful. Happy Travels! – Scott and Megan
A lot of helpful information. As a total newbie to the world of DSLRs and travel photography, I’m always looking for ways to improve my shots.
Glad it helped you in some way, now go out there and practise 🙂
If you opt to take a lot of gear on a trip my advice would be to never take your eyes off it. I had $5K worth of gear stolen from a Vienna restaurant two years ago; it was in a bag slung over the back of my chair. Next trip I took only my Canon G11; got great shots and didn’t have the worry of a big camera bag. In fact, I probably took more photos than If I’d had my big camera because it is so convenient.
Yes having gear thats bulky and recognizeable is sometimes a detriment in traveling and having something small may be the right thing to have in certain situations like a dining event.
I normally don’t carry my camera in a camera bag…too obvious that it’s well….a camera! Also, in my mind the bigger the camera bag the more likely that there is a flash, additional lens etc. inside the bag.
My sister in law actually uses a small cooler bag on vacation sometimes as her purse. Her philosophy is who would want to steal someone’s lunch?
I agree, I don’t like advertising I have an expensive camera, please take me, its better to keep it in your day bag or backpack.
i do agree, im a travel photographer and find it super important to travel light