Using light to tell a story is the heart of photography. While balance and contrast are terms that you’ve probably been working with since you first picked up your camera, there are a few game-changing light tricks that you need to try out to fully get the feel for.
10 Ways to Brighten Up Your Photography with Light
Experimenting with light can help you reach your higher compositional goals while stirring your personal creative expression. Here are a few techniques to get you started:
1. Use Windows When Shooting Indoors
The light coming through windows can give your portraits a balanced look. Nor does the sun have to be shining in an intense beam for your window to offer you an ideal light source.
In fact, the diffuse light from a cloudy day or indirect sunlight can make for a softer and more balanced portrait. Alternately, hard light coming in beams through a window create more dramatic portraits with a lot of harsh shadow play.
One tip for using window illumination is to try not to introduce other light sources into the scene. The use of multiple light sources will rob your image of the realism created by the natural light, while also potentially introducing an additional color palette that could confuse the image.
2. Use an External Flash to Fill Out Your Light
Smartphones are making external flashes more portable than ever. But figuring out where your external flash fits into your photography is related to finding your own style.
In most cases, the external flash isn’t intended to be the only source of light, unless you’re shooting in the dark to produce a dramatic effect. Most of the time, the external flash should be set up in spots where it will illuminate parts of your subject that would otherwise be shadowy.
Watch out for using your flash on reflective surfaces, such as a mirror or window, since the reflection could detract from the overall image.

3. Use a Diffuser or Reflector
A reflector is a way of reflecting soft light back onto your subject without having to create another light source. Reflectors help you to fill in shadows and get a more three-dimensional appearance.
Diffusers are a little different, as they don’t reflect light but instead make your light source softer and less likely to create harsh shadows.
4. In a Pinch, Try a Pop-Up Flash Bouncer
Light bouncers can help your to soften the light from your flash by bouncing it offer another surface. Direct light can flatten your subject, while bounced light brings out shape and dimensionality.
You can make your own transportable light bouncer to upgrade an on-camera flash by installing a business card sized piece of cardstock on the lower part of your pop-up flash that will bounce the light and allow it to appear softer and more diffuse.
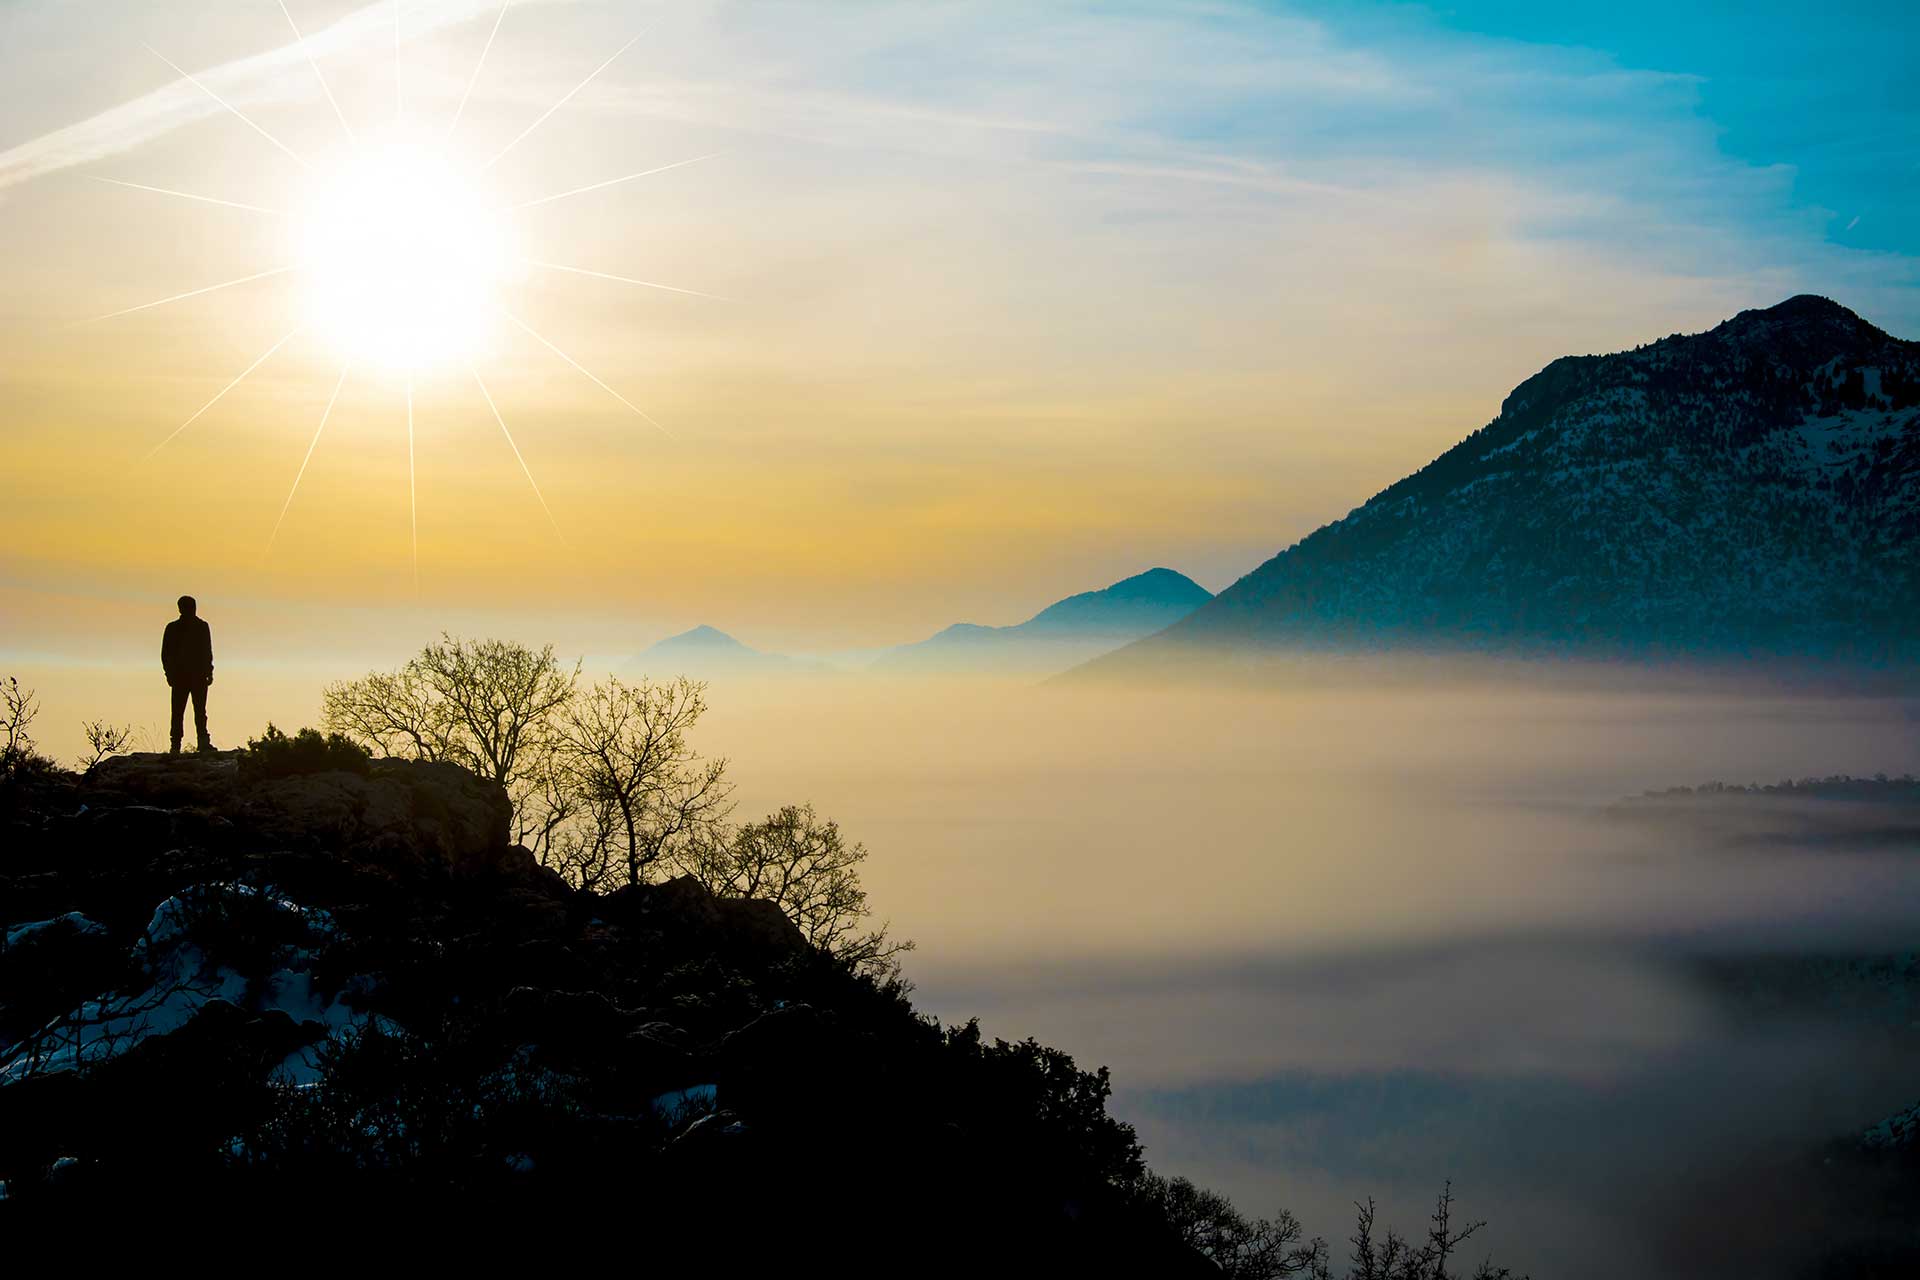
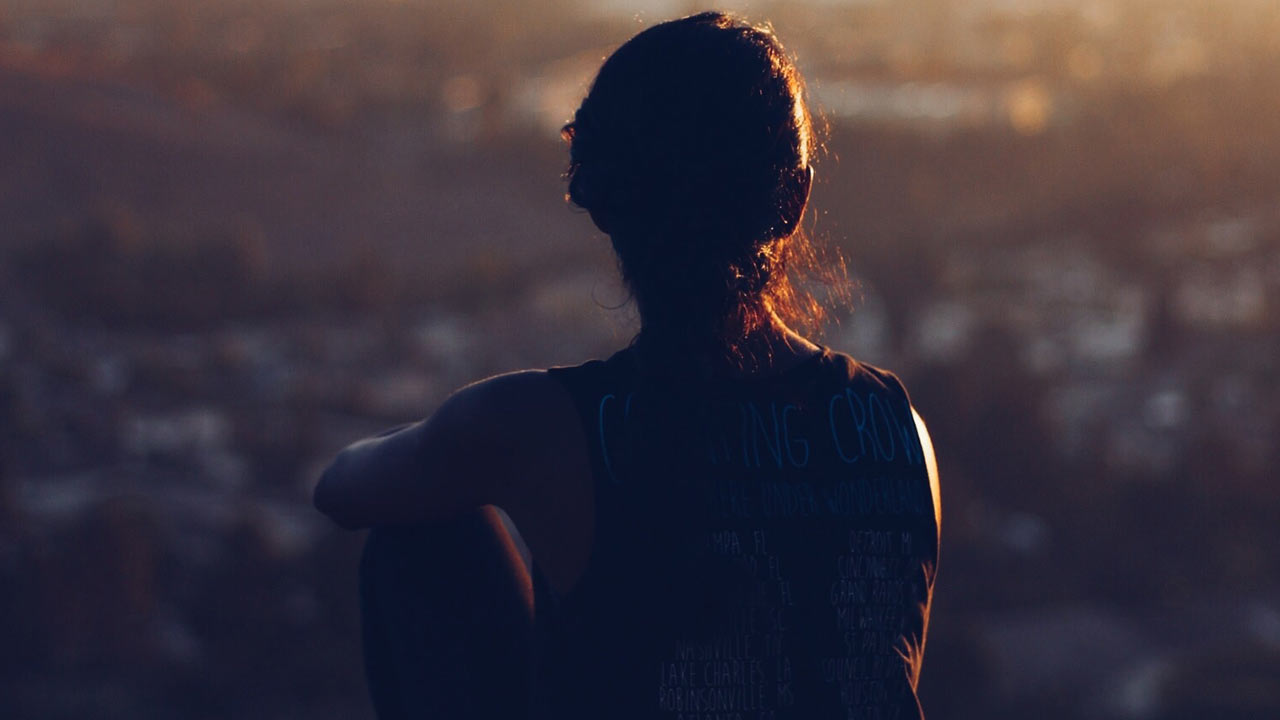
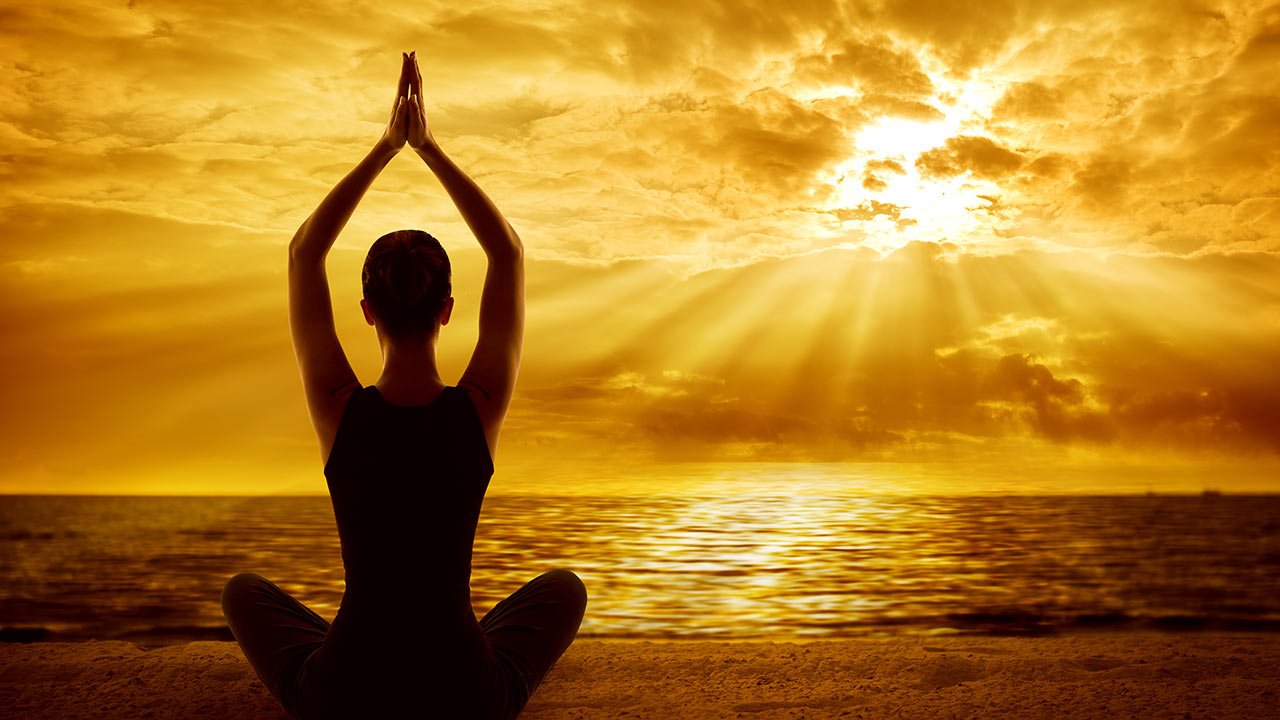
5. Shoot a Silhouette
Silhouettes are created with strong backlighting while your un-illuminated foreground and subject remain underexposed and shadowed.
Silhouettes can frame your subject against beautiful natural backgrounds, such as sunsets, night skies, or ocean scenes. They tell a story using position and arrangement to convey the relationship between their subjects.
Silhouettes work well for when you want to create a big image. It’s easiest to take silhouettes twenty to thirty minutes before sunset. To take them, you will need to over-expose the light in the background while underexposing your subject in the foreground. This can be done with an aperture priority setting of f/2.8 and ISO of 400.
6. Light Painting
Light painting refers to using a long shutter speed and a light source, such as a flashlight, smart phone screen, or external camera flash to make patterns in the photo frame. One of the joys of light-writing is that you won’t get the same image twice.
To do this, you will need a camera that can be switched onto manual mode, allowing you to manipulate the shutter speed, and a tripod to make sure that they only thing moving in the image is the source of light. This effect also works the best when you’re in a dark setting.
Set the shutter speed between .5 seconds and 5 seconds, depending on the kind of effect you want to create. For interesting blurring effects, try using an app on your smart phone with multiple light colors as your light paintbrush.
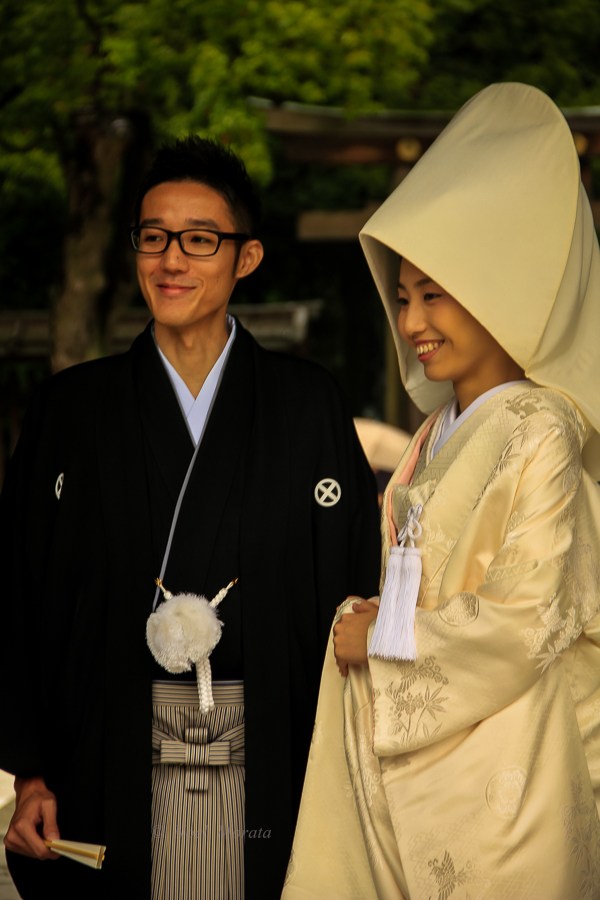
7. Get to Know the Golden Hour
The golden hour normally occurs just after sunrise or just before sunset. Of course, the exact times depend on where you are. Fortunately, for campers, this is just the right time when you’re likely to be resting at the campsite or just stretching your limbs to begin the day.
The golden hour is amazing for photography because the natural light is at its most rich and diffuse. It makes for a soft light that can evenly illuminate skin tones while conveying warmth and dimension.
One of the golden hour’s most prized light effects is called rim lighting. Often used in portraits, rim lighting is when the sun backlights your subject creating a haloing effect. Rim lighting can make your subject pop from the rest of the background.
8. Experiment with a Ring Flash
Ring flashes are common tools most often used in glamor shots in the fashion industry. The actual device is a flash that fits around the camera lens.
Ring flashes create a subtle fill light that imposes very little on the scene and subject by producing diffuse, atmospheric light. Ring lights can expose details in a scene that would otherwise have a hard light, perhaps something like otherwise obscure jewelry or luxury watches. They can also be an excellent choice for shooting macros because of their ability to offer very soft light.

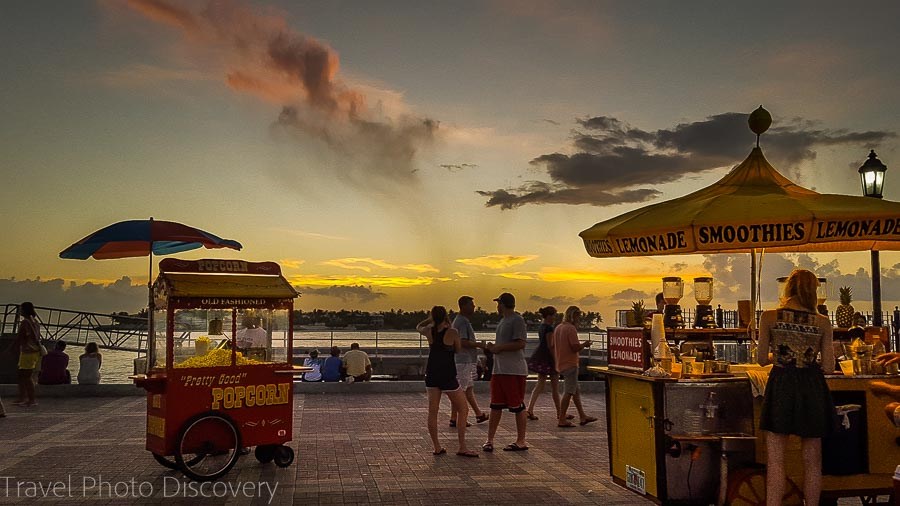
9. Illuminate Your Subject in Low-Light Situations
When you’re in a low-light situation attempting to use and properly position a light source can be tricky. In this case, an external light source can refer to an external flash or work light, as well as a lamp, smartphone light or flashlight. Your camera may have difficulty with focusing without a strong light source. It may also create a blurry photo if left to its auto functions, as it works to try to capture as much light as possible.
In this case, it’s best to position your light source as close to your subject as possible. Ideally, you want to primarily illuminate your subject, rather than all the environment around it. Limited illumination like this will make it more likely to take a picture with a clear, sharp focus.

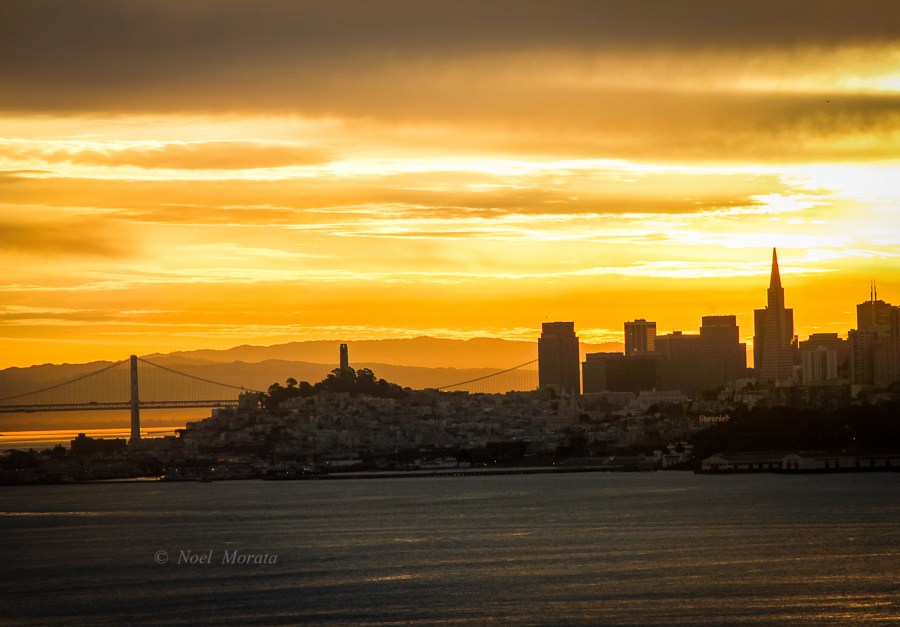
10. Play with Sunflare
Most conventional photography teaches you how to cut down on sun flares by using indirect light for your shots. However, sunflare can add a creative illumination to your photos.
When you’re shooting sun flares, keep in mind that a wide aperture setting will allow you to create a soft flare. Whereas, a smaller aperture setting will result in a flare that is harsher and more defined.
Many of the best effects of sun flare come from its placement in a composition. Experiment with interesting effects by hiding the sun partially behind an object (or perhaps partially behind a building in a busy street) in your photo or making it so that the sun is not fully in the frame.
Experimenting with light is one of the keys to learning how you like to take your photos. While you certainly don’t have to try everything at once, it can be inspirational to know what’s out there as well as the different effects you can get from different photography tricks, compositional rules, and devices.
If you enjoyed these camera tips, please check out some of my other photo tips below
Black and white photo tips for beginners
15 photography tips for your road trip
Capturing street images – some photo tips and techniques
15 Instagram tips for better photos and compositions
10 Photography tips for grey sky or rainy days
Flower and nature photography – tips on making your images pop
Photographing people – some tips and techniques
Photography tips for travel Photography
Travel photography – what to pack
Photo tip – backlighting your image
Food photography – making your images pop
Please pin this for later

Guest Post Bio
Kelli is a healthy lifestyle blogger for GroomandStyle.com. She has been a regular contributor to sites talking about the newest trends in photography, smart style, fashion and fitness. When she’s not writing, she enjoys photography, hiking and pretty much anything outdoors.
Thanks for visiting today and checking out this post on this Best lighting techniques for creative photography, if you enjoyed the images and post, could you please share it with any of the social media buttons located around the post.
If you like what you see, come and check out my other social media channels for more updates, including Instagram, Pinterest and Twitter
Disclosure – There are affiliates links on this posts which provide a small commission to support this site at no extra cost to you. Thank you for reading, and happy travels

Thank you so much, Noel, for sharing those stunning photos to bring your points to life! Your photography tips are truly inspiring.
thank you for the kind words, appreciate it
Rich information on lighting. It would be great if you write a dedicated article on camera settings on different lighting conditions!
I am going to try this technic next.
Thanks Noel
Sure, glad you will try some of these lighting techniques
Those tips are really effective and important. Thank you for those photos also.
Thanks for that and hope you get to practise most of these techniques
I think i can be professional photographer now. Thanks for your valuable knowledge to share with us.. Keep it up.
Great results Noel. I really enjoyed the article for my work and I learned some lighting techniques too!
As some of the commenters here seem to like the articles, too. I’ll just link in my post next if that’s okay?
Thanks for the great tips, but I’m even more thankful for the great photos you used to illustrate your points. Beautiful photos!
I wanted to thank you for photography skills!! I
absolutely loved every bit of it. I have got you book-marked to
look at new things you post…
Awesome,glad that this has helped for the Best Lighting
Excellent photo tips. I find lighting one of the most challenging aspects of photography, so I appreciate your advice!
Thanks lighting is tough and I hope that helped you to schedule some fun photography shoots
Lots of good tips here, and reminders for more experienced photographers. Fill flash is one of the best tips ever, and one almost nobody knows.
These are wonderful lighting techniques to use for really creating amazing photo imagery
Amazing images! My husband is a photographer and l try to emulate him but sometimes find it frustrating :-). Thanks for sharing these tips, you can never stop learning.
I agree, these are fantastic lighting techniques and tips for better photography and creating wonderful imagery and light challenged.
Considering my complete lack of photography skills, these tips will hopefully make my shots appear even halfway decent! Either way, always interesting to read about the tools and tricks the professionals use. Love learning about an art form that is so foreign to me!
Fantastic, glad you learned a few more lighting techniques and tips
Such fabulous photos you have shared to illustrate your points. Thanks for these photography tips, Noel.
Fantastic, glad you liked these lighting techniques for creative photography.